How to disable the ribbon from File Explorer in Windows 10

To remove the ribbon from File Explorer, you need to download and run a small file called Ribbon Disabler. It’s a clean freeware tool and easy to use.Get started by downloading the software you can Download it form this link.


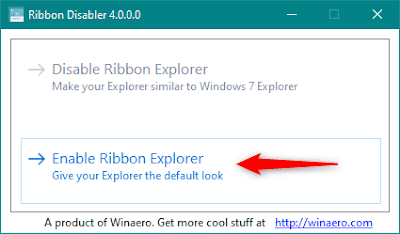
There will also get an executable file called RibbonDisabler.exe. Double-click on the RibbonDisabler executable file, and a small dialog window should open. Inside it, there are two options: “Disable Ribbon Explorer (Make your Explorer similar to Windows 7 Explorer)” and “Enable Ribbon Explorer (Give your Explorer the default look).” To remove the ribbon from File Explorer, click or tap on the “Disable Ribbon Explorer” button.

Then, the app asks you to log off to apply the change. Click or tap Yes to do it right now, or choose No if you want to do it later. However, until you do log off, the ribbon from File Explorer is not going to disappear.
After you sign in again, open File Explorer and see if you like it better now, without any ribbon menu on it:

If, after a while, you change your mind and you want the ribbon back on your File Explorer, run the Ribbon disabler executable once again. This time, however, click on the “Enable Ribbon Explorer” button.


